VERY Easy Paper
Butterflies

For this
project all you need is square paper, scissors and some glue.
You need to
fold the square paper from corner to corner to make a triangle, unfold it then
do it again with opposite corners. Next fold it in half so it’s a rectangle,
unfold and repeat it folding it the opposite side.


You should have your square paper looking like this with lots of folds:-

Next fold the paper in half so it’s a rectangle again. This next step is a bit hard to explain but I’ll give it a go …… You need to ‘push’ one end into/inside of the rectangle so there is a triangle at one end of the rectangle.

Next fold the paper in half so it’s a rectangle again. This next step is a bit hard to explain but I’ll give it a go …… You need to ‘push’ one end into/inside of the rectangle so there is a triangle at one end of the rectangle.
Then do the same to the other side. You now should have a triangle !!

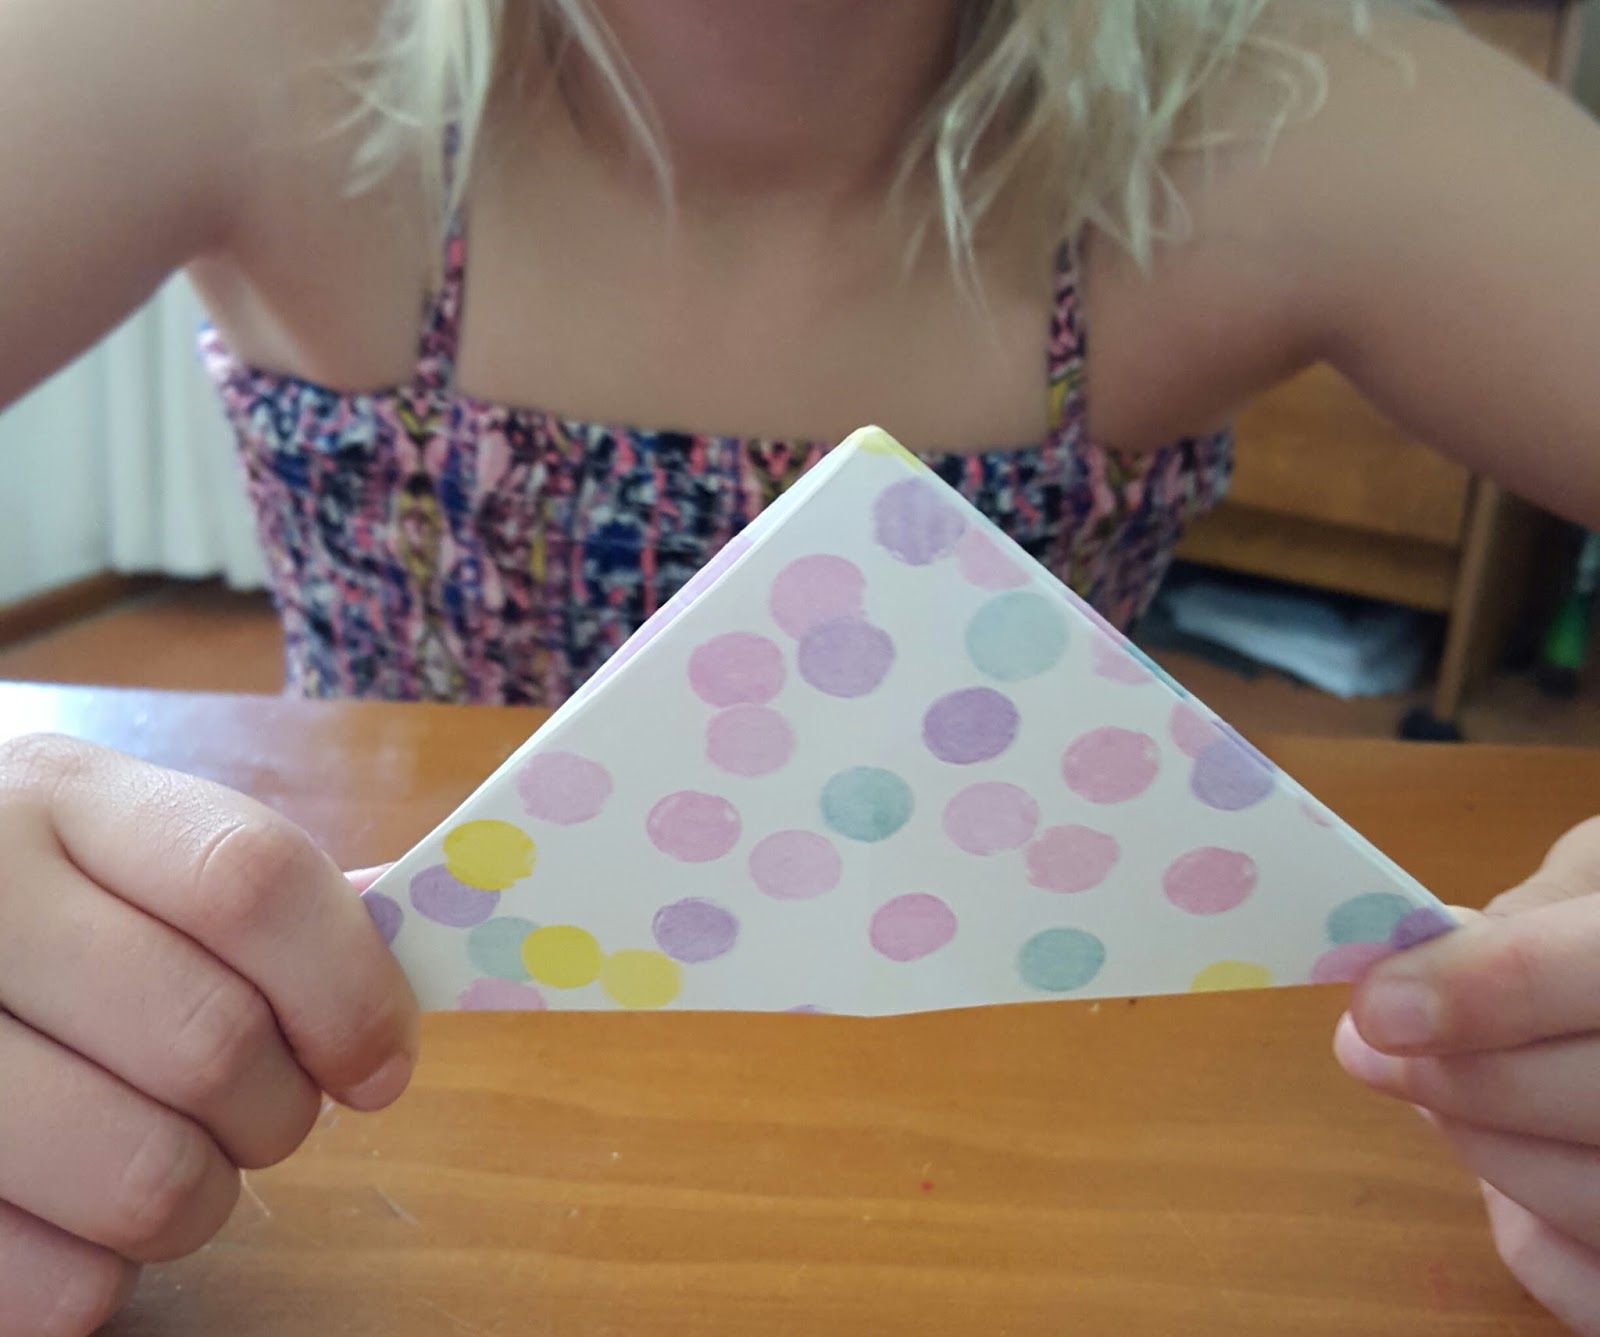
Now fold the
triangle in half and where all the ‘loose’ ends are, trim them into a rounded
edge.


Open up the
half fold so the triangle now have 2 rounded ends. Fold one side of these
rounded ends into the middle.


Flip over
and fold down a small section of the pointed end.

 We put a little bit of glue
on the inside of the little folded bit, then you bring that bit around the back to
the front (the butterfly back will arch a bit) and glue the little triangle to
the long base edge. We placed a peg onto it to keep it in place until it dries.
We put a little bit of glue
on the inside of the little folded bit, then you bring that bit around the back to
the front (the butterfly back will arch a bit) and glue the little triangle to
the long base edge. We placed a peg onto it to keep it in place until it dries.


Once it dried
we removed the peg and ……. We now have a butterfly !!


The original
pattern I found on this website http://www.foreverymom.com/kids-will-love-adorable-easy-paper-butterfly-craft-tutorial/
No comments:
Post a Comment