Wednesday, 24 February 2016

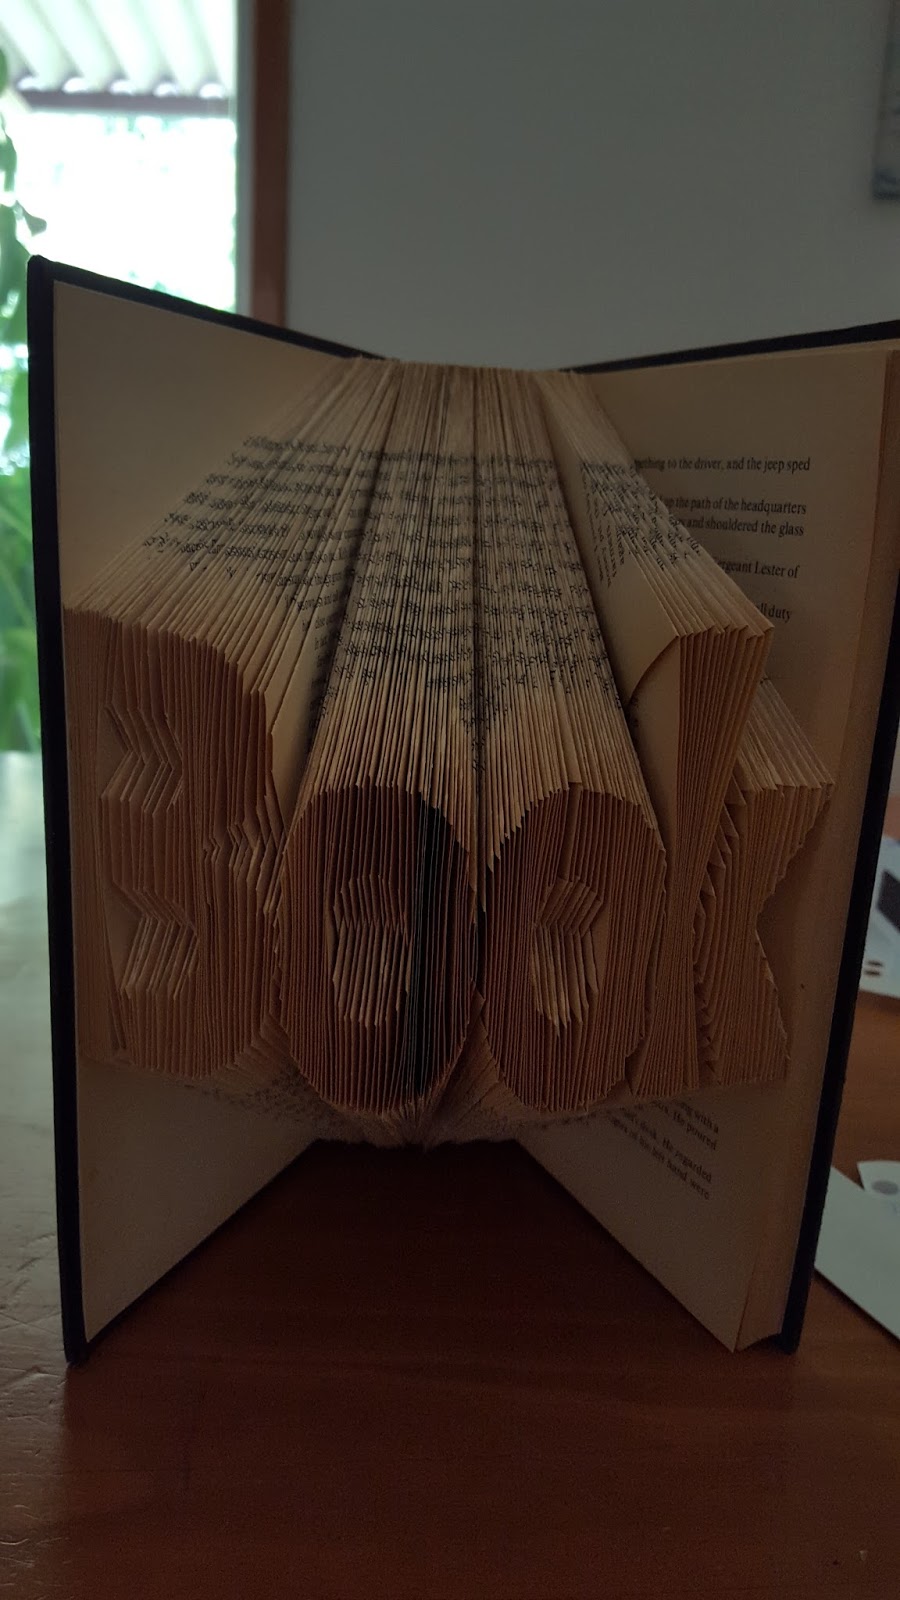
BOOK PAGE FOLDING


Book Page Folding

This is not a hard thing to do, time consuming maybe but not hard!!

This is a great gift idea as you can personalize the word or image to suit anyone!!
 

The first thing I did was to print out the word and size I wanted on some graph paper.

Then counted how many pages I needed. You don’t need to leave any pages/spaces between each letter. Some letters like ‘s’ ‘c’ ‘b’ etc you need extra pages as each page you only fold once and when there is a part of the letter (vertically) top and bottom in the same line you use two pages. With a ‘B’ you even need 3 pages per line at some parts!!

 E.g. with this ‘B’ alone you need 79 pages to fold. As you start folding it will all make more sense.
For this word ‘Books’ I needed to fold 320 pages so the book I got had 640 numbered pages (as every page has a numbers on both sides!!)

Now the easy bit!! You need a pencil, ruler and book with enough pages.

On the first page place the ruler as close to the spine as possible and lightly mark the page at the top and bottom.
 
Slip in the graph paper until the edge of the ‘B’, making sure that you line up the top of the page with the top of the graph paper.

Again slightly mark where the top and bottom of the letter ‘B’ is with pencil on the first page.

Remove the graph paper and mark your spot on it too!!

Now match top two top marks (top of page near the spine and top of the ‘B’) with the ruler and fold

Repeat to the bottom two marks. Frist page done!!

I used a bulldog clip to keep the pages out of my way.

Keep doing the above steps of marking (both near the spine and the letter) and folding, don’t forget to mark your place on the ‘B’ template so you can keep track of where you are up to.


When you get to the busy bit of the ‘B’ you will need to fold 3 pages per vertical line

This is what the ‘B’ looks like when finished
 

Slowly work your way through the word and book.

When I got to the end I still had some pages left over (the book had more than 640 pages) so I folded a little heart in the top corner. You could also neatly remove some pages if need be.
HOW COOL ARE THESE !!

Sunday, 21 February 2016

Wobbly Egg Heads


Wobbly Egg Heads


As kids I remember making these Wobbly Egg Heads with my brothers!!


The first thing we did was to ‘blow’ the eggs. One hole needs to be small but the top hole (small end of the egg) can be a good size. We used a pin to create the holes, then blew through the little hole so the egg yolk and white came out of the bigger hole. After the eggs were ‘blown’ we rinsed them out then put them into the sun to dry.


The next step was to evenly weight the base of the eggs so they can stand upright. We used UHU tac but you could use anything – clay, plasticine, playdough etc. There was a little bit of fiddling to get it weighted correctly.


Now we drew and cut out a circle from decorative paper. We put a cut up to the centre.


We slip one cut edge under the other to make a little pyramid shape hat, then stuck it together with tape.


The fun part was drawing faces onto the eggs using permanent markers. Now we popped the hat on with a bit of glue.


DONE!!


Thursday, 18 February 2016

Gift or Trinket Boxes


Gift or Trinket Boxes 


I use to make these little boxes as a kid from old gift cards.

I got so excited when I stumble across them again on Google+ from www.burkatron.com

 SO.... I thought that I would get my daughter to make them too!! Serena now can’t stop making them for all her jewellery and trinkets!!
 

The first thing you need is 2 pieces of square paper or card. One piece slightly smaller than the other.
 

Fold it in half diagonally (both ways)

Now fold it in half normally (both ways)
 

Fold each corner into the centre


Fold the straight edge into the centre – both sides.

 
  Unfold and repeat on the other straight edge side.


This next bit is tricky to explain so follow the photos if you are having trouble. Open up opposite triangles ends and stand the folded straight sides up.

Bend up the open triangle end at the crease closest to the centre,  push/fold the flaps in. (It should look like the photo.)

Now fold over the flap. It should sit in place neatly.

Do the same to the other side
Done!!

Repeat to the other piece of paper.

The bigger one should neatly slide over the smaller base to make the complete Gift Box.